A drop tower is a experimentation setup that drops a mass onto a sample to see how it responds to impact. I designed the control board for a custom micro-scale drop tower in the Portela Research Group at MIT. The board connects a Raspberry Pi to everything the tower does: positioning the sample, lifting and dropping the mass, and signaling when a drop is about to happen.
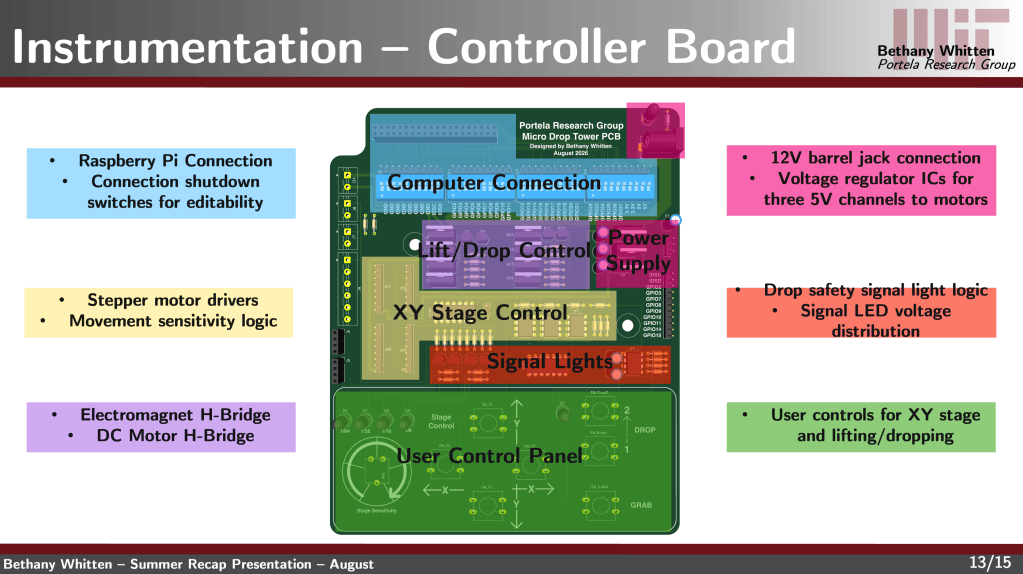
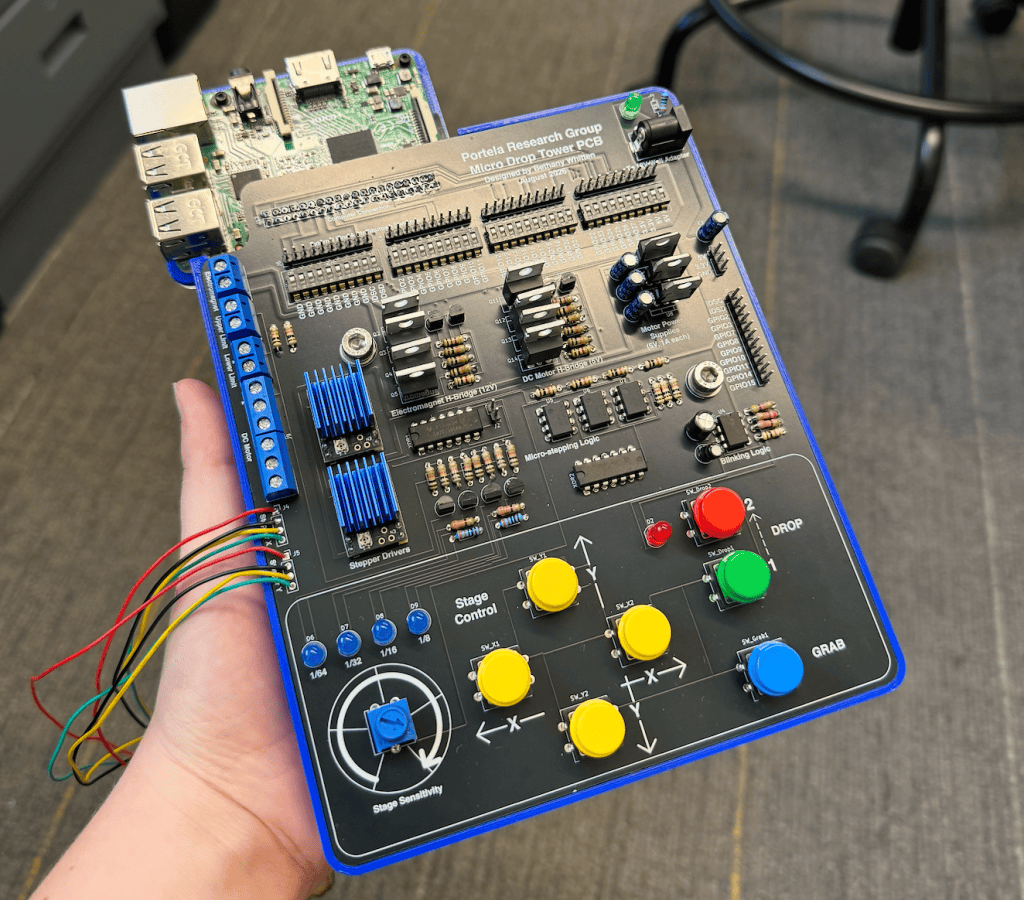
The board is organized into functional sections:
- Raspberry Pi connection: The Pi plugs in through a header, and shutdown switches let me disconnect individual sections so I can edit and debug parts of the board if needed.
- XY stage control: Stepper motor drivers move the sample stage along X and Y, and movement sensitivity logic lets the user change how far each step moves.
- Lift/drop control: An electromagnet H-bridge and a DC motor H-bridge handle lifting and releasing the mass.
- Power supply: A 12V barrel jack feeds voltage regulator ICs that produce three separate 5V channels for the motors.
- Signal lights and drop safety: Dropping the mass takes a two-button sequence. Pressing the first button starts a blinking light, which shows that the sequence has begun. Pressing the second button at the same time releases the mass. This makes an accidental drop much less likely.
- User control panel: Buttons move the stage in X and Y and control lifting, dropping, and grabbing. A dial sets the stage sensitivity, and LEDs show the current setting (1/64, 1/32, 1/16, 1/8).
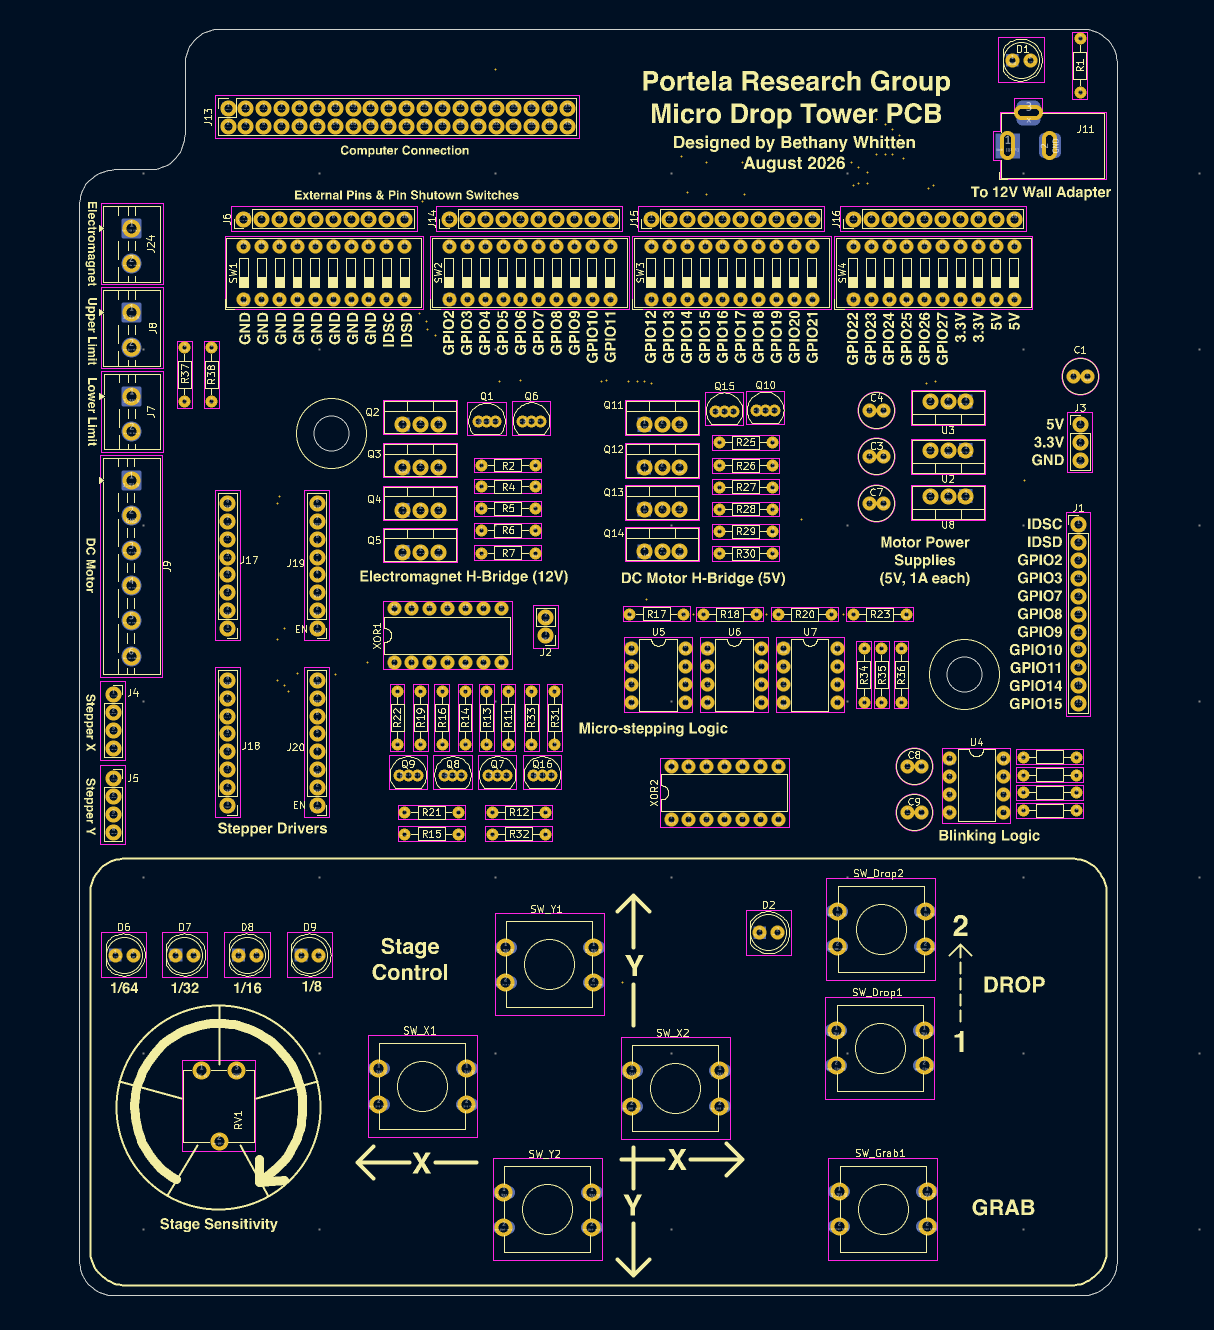
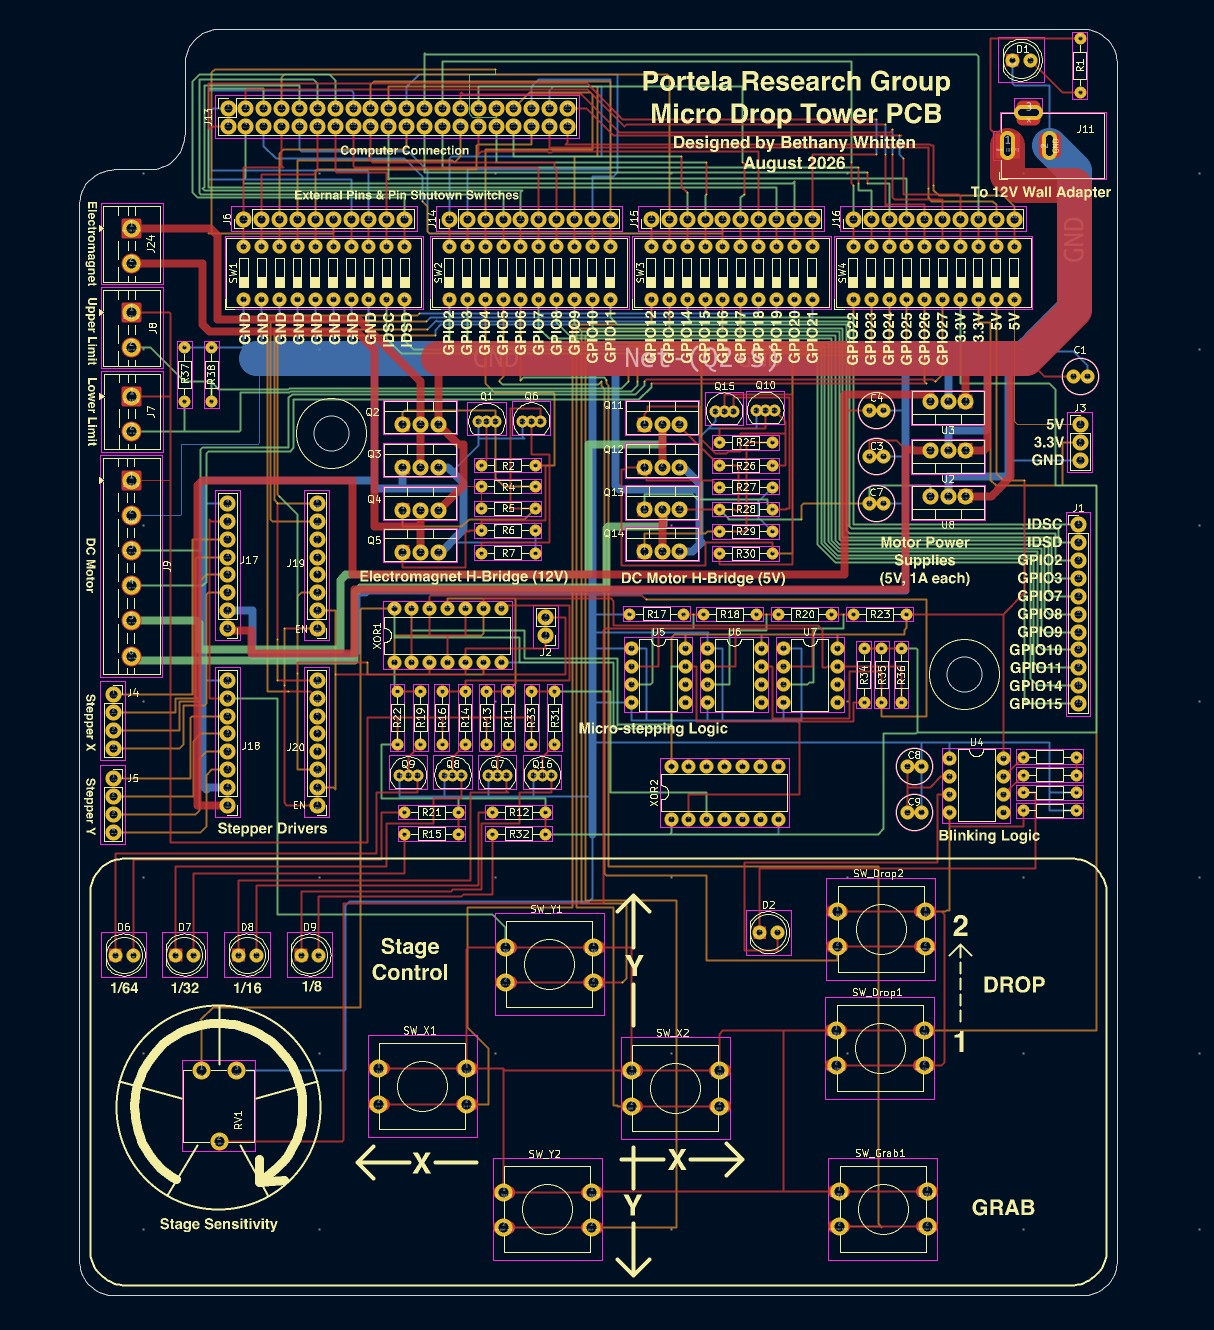
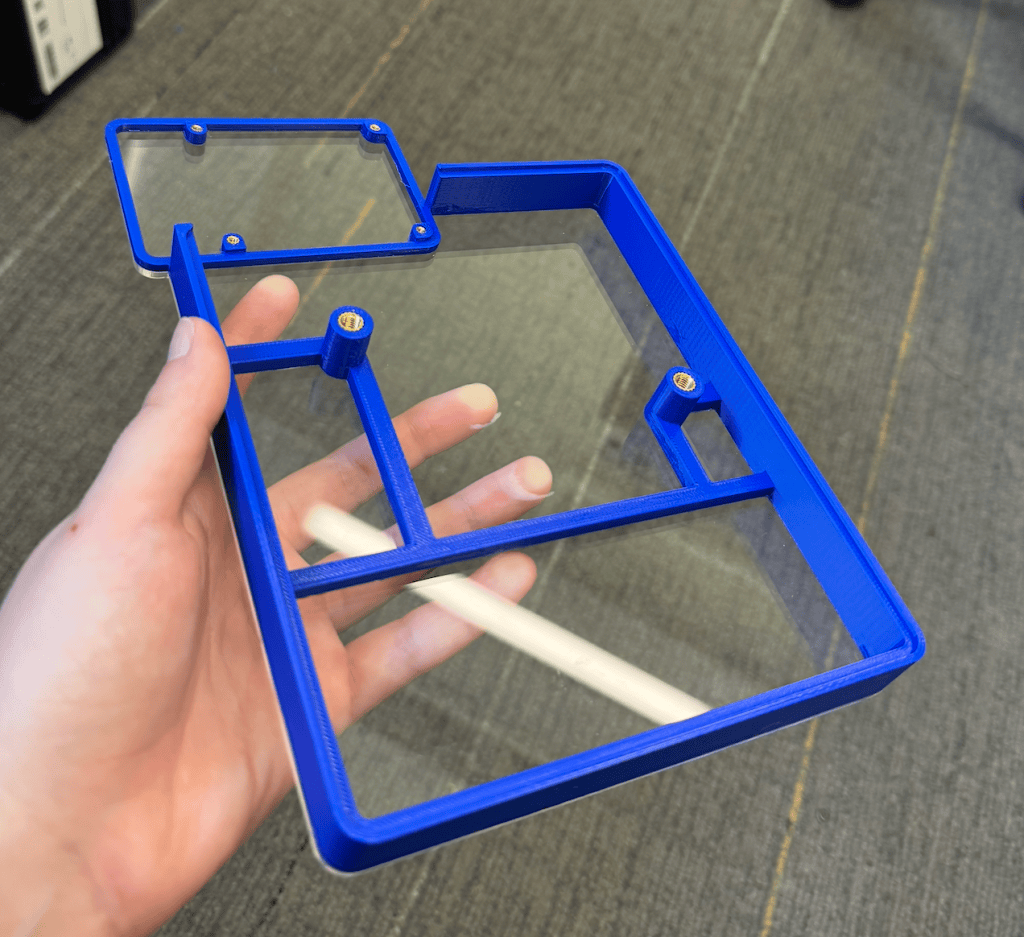
The PCB was designed using KiCAD. I also designed and built a case to protect the board. The case is made of 3D printed PLA and laser cut clear acrylic, protecting the back of the PCB while allowing visibility to the solder joints.
Currently, the drop tower works very well with the PCB controller board. I still commute from Tufts to MIT to continue the research, and we hope to run our first successful drop experiments soon!

